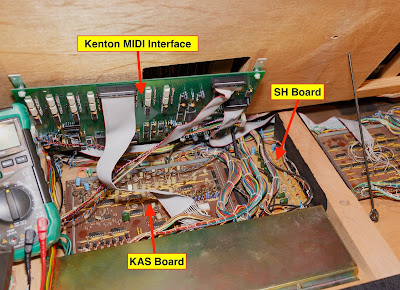
CS-80 Calibration Part 4: KAS and SH Board
To work on the KAS and SH Board the keyboard has to be lifted. Click here for further information about which screws have to be removed.
Measuring on IC2 requires some caution as I think it's nearly impossible to find those fancy white ICs as a spare part somewhere. I started to use my oscilloscope probe (with a BNC adapter) because the tip is so much smaller and easier to handle than those huge DVM probes.
Doing measurments on IC3 can be a little tricky as I accidentally slipped about two times and short circuited two pins which resulted in some sparks. Fortunately nothing happened.
In case you are unsure about the pin layout of IC3, count clock wise. The little nose on the metal case represents pin 8, not pin 1.
Besides that nothing much to say here, adjusting all steps to spec was kind of straight forward. I just recommend to wait a moment and a little longer after adjusting a trimpot (with the screwdriver removed). Sometimes there was a little change after a few seconds, once it even went out of specification tolerance.
Caution is also required when cracking that screw glue paint on some pots. It is sometimes a little too sticky, I almost ripped one trimpot case out on another board.
Continue to Part 5: M-Boards
Continue to Part 5: M-Boards


